The Fence One Year Later
Last summer we spent several months building this fence (sponsored by Lowe’s!). It was a long, but rewarding process. no really, a 4 month project. We did everything from planning the design, select materials and building it with the help of our friends. The fence has contributed to our lifestyle SO much. I didn’t think it would make such a big difference, but it did – we can open the back door and let our dogs out. No bending over to clip their leads or leads getting tangled. Our dogs have a safe, fenced in yard to play and run in, we can garden without fear everything we plant will be eaten by deer and we have seen a noticeable drop in ticks since blocking out larger animals. (I shared more info about the tick situation in this post.)
I have to address the vinyl question. Why not do vinyl – so much less upkeep? I legit hate vinyl anything and I will not use it on our historic home. I think it looks super fake and plastic. There is no nice way to slice and dice my opinion – so there ya have it! I don’t see the point in owning a beautiful historic property and putting fake plastic next to an old home. Wood ages and looks like it belongs with the house and that relationship between materials in the landscape is important.
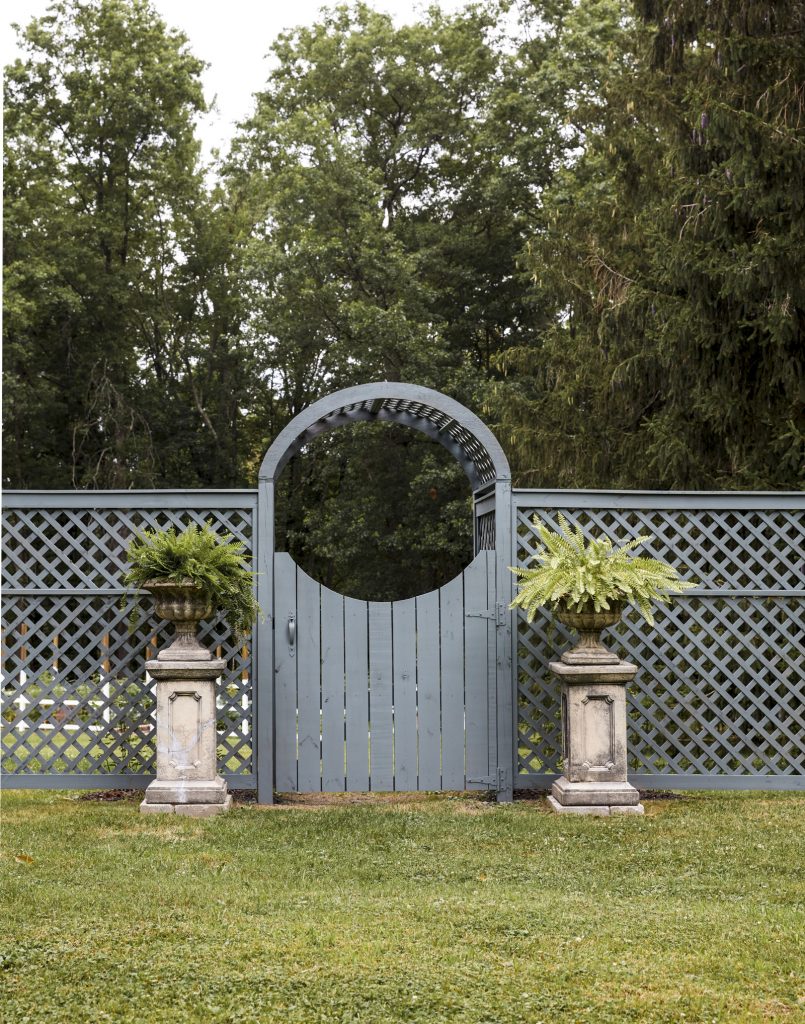
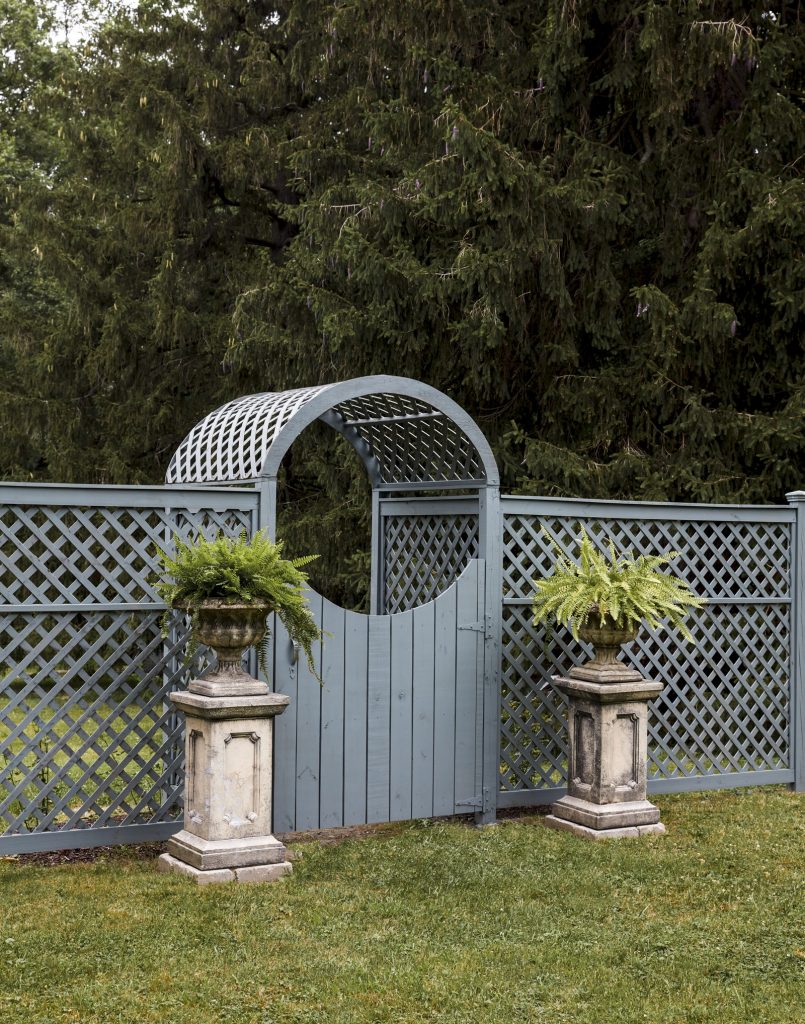
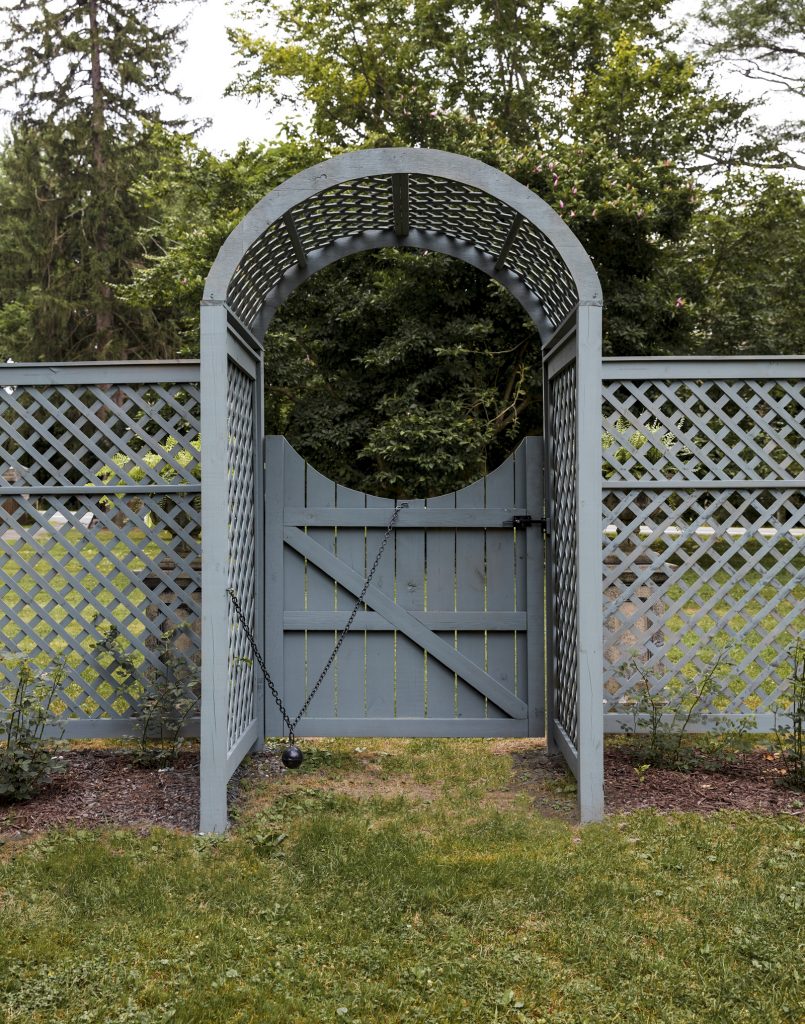
It’s been a year and we finally get to paint the fence! Because the wood is weather treated, you have to wait about 7 to 12 months to paint. We didn’t want to leave bare wood so close to our formal house. (The house is Greek Revival.) The fence is quite high and really needs to speak to the house. We painted the fence using a paint sprayer and it’s so worth every penny you’ll spend on it. (Here’s the one we have, and we quite like it. We use it to spray all our radiators inside the house too!)
The paint color is from Lowe’s and it’s Valspar Duramax exterior paint and primer in one. The name of the color is Coastal Dusk. I really love it – the color blends into the landscape and doesn’t make such a hard line next to the house. We have a lot of large scale trees and the color provides a nice line, but co-exists with nature and doesn’t cut in.
One small detail we made a very considered choice about is painting the hardware. I wanted to paint the hinges, which was hard for me. Cause I hate painted hardware. I want the fence to look old, like its been there for 50+ years. When going on garden tours, I noticed a lot of painted over hardware. I think we’ll get a new gate latch in an old fashioned style, but until then, this works. The ball and chain is from Lowe’s, and it keeps the gate close. It’s a vintage design that works really well. Tip: don’t try to buy this vintage – I’ve seen these at antique garden shows for $400+. You can’t tell the difference between the new and the old!
Garden Plans
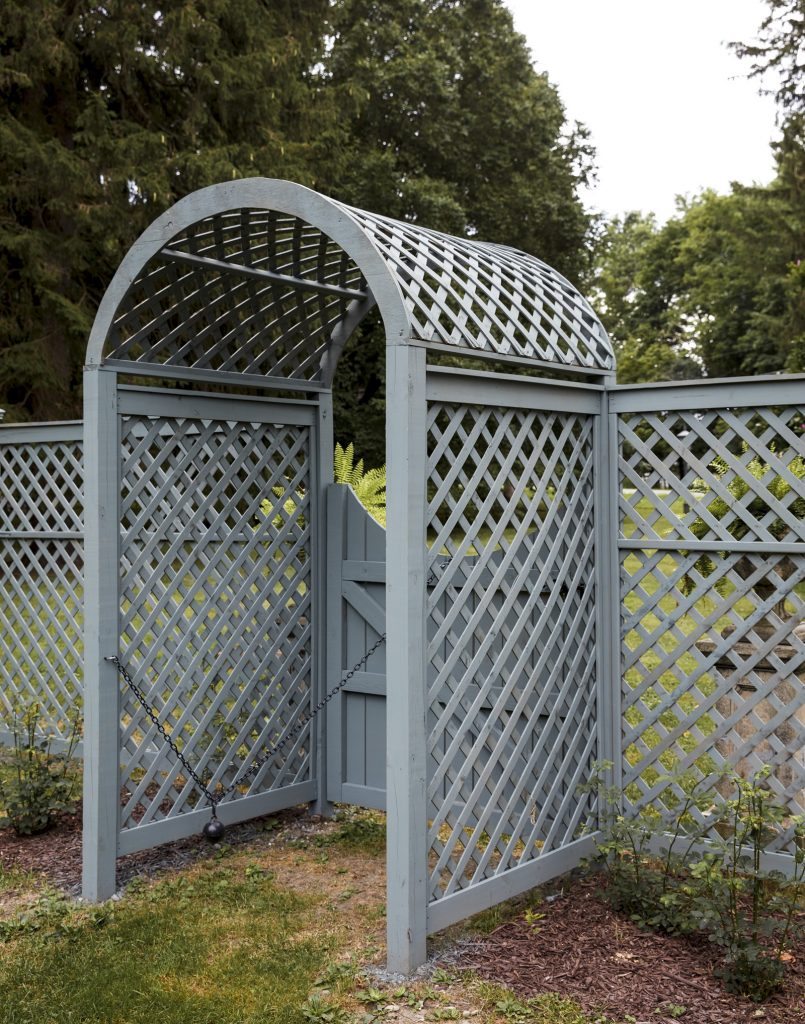
I planted two regular rose bushes and two climbing roses on each side of the arbor. It will take years to see them come into their full beauty, but I can already imagine roses climbing the fence and arbor. My sister bought me her favorite roses from David Austin (The Alnwick) for the traditional bush roses, and I picked the Clair Austin for the climbers.
In the fall or next spring, I want to plant hydrangea in the front of the fence. I need to give us time to prepare the beds because the soil is very clay in some areas close to the house. Our neighbor Wayne says: You take a $10 plant and put it in a $20 hole. So true. By the time I amend the soil it gets to be quite an expensive project! Plus I think I need around 17 plants to run the length of the front.
The final vision is soft, white hydrangeas in the front of the painted fence, a herringbone brick walk way through the gate and the planters on each side of the gate. You’ll see a little sneak peek of the roses over the arbor. Once you walk through the gate, you’ll be met with roses all around. This can take years to realize, but we’re through the first leg!
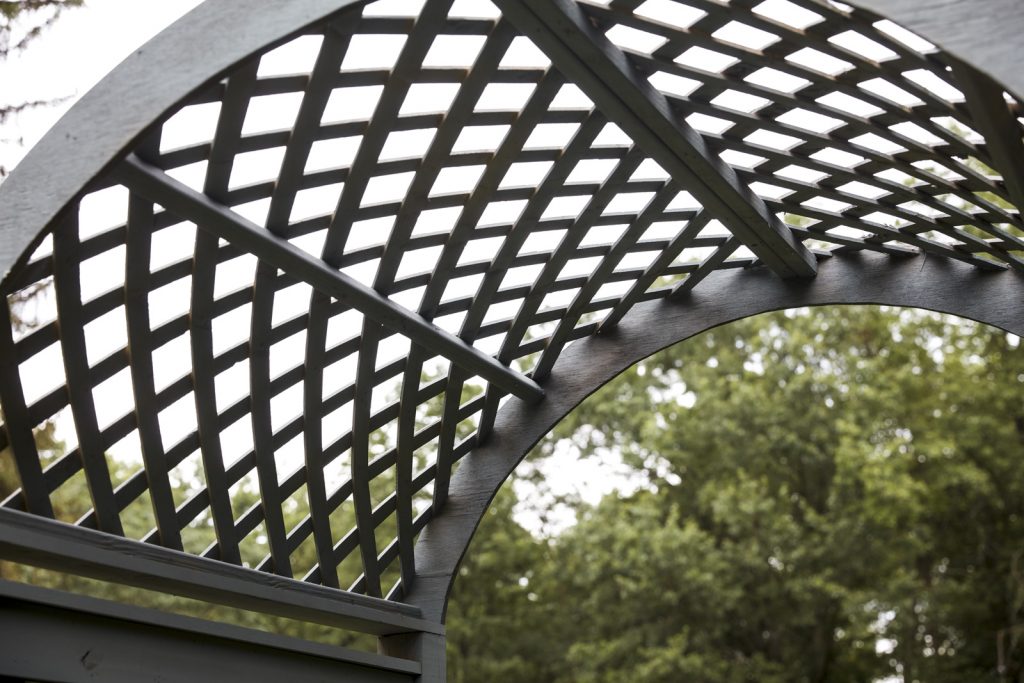
Arbor Building Process
I didn’t post this in the fence build because we weren’t sure it would work, but it did! If you want to make an arbor like this, be sure to read the post about the fence because the arbor uses the same technique. If you understand the post and panel installation technique, you’ll get this arbor design, no problem.
Let me tell you why we decided not to buy an arbor.
- Most were made from plastic and I don’t like vinyl anything.
- They were not deep enough, our is about 4 ft deep so you feel like you’re in a tunnel entering a new place (aka the backyard).
- We couldn’t put the posts in cement deep enough for a sturdy gate.
- Most were too narrow in width, ours is a bit over 4 ft so we can get a wheel barrow or garden cart through.
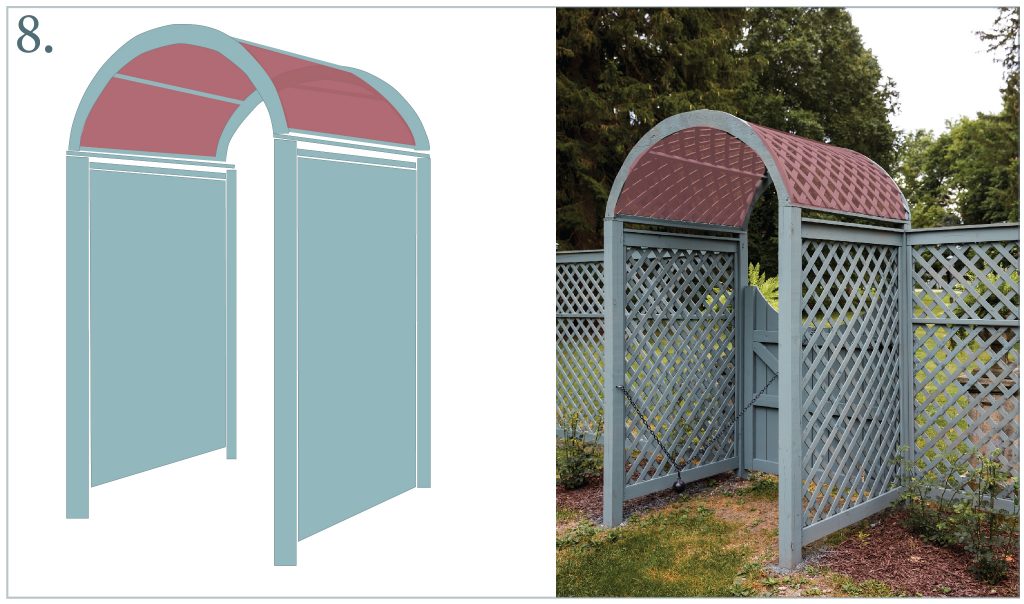
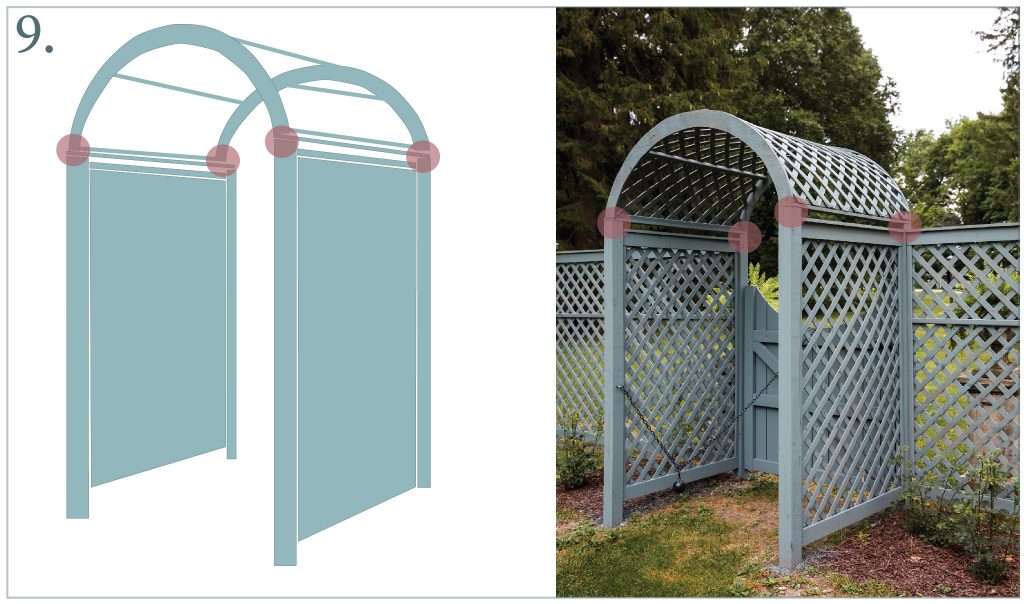
Step-by-Step Process
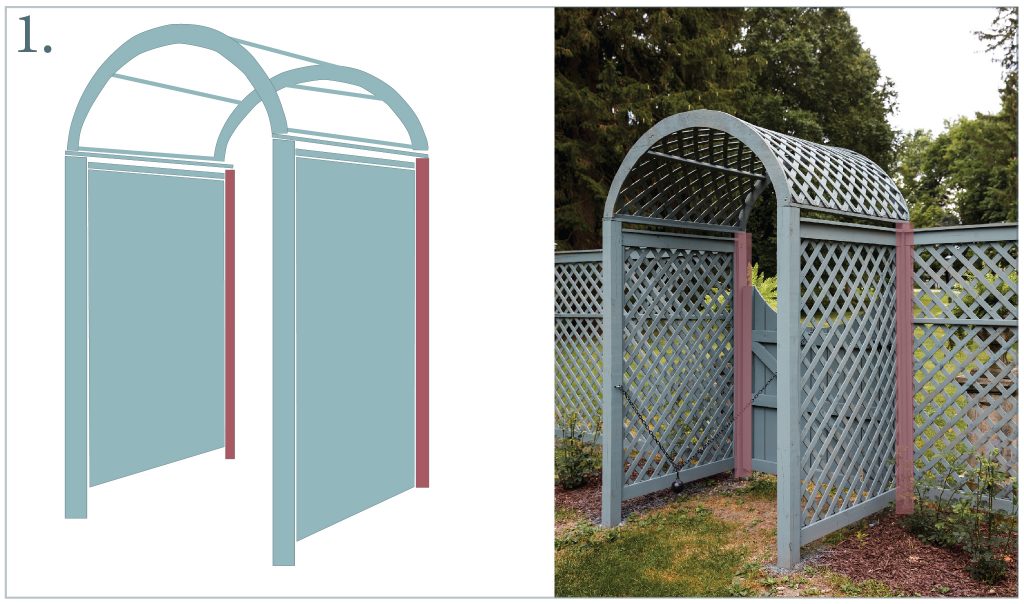
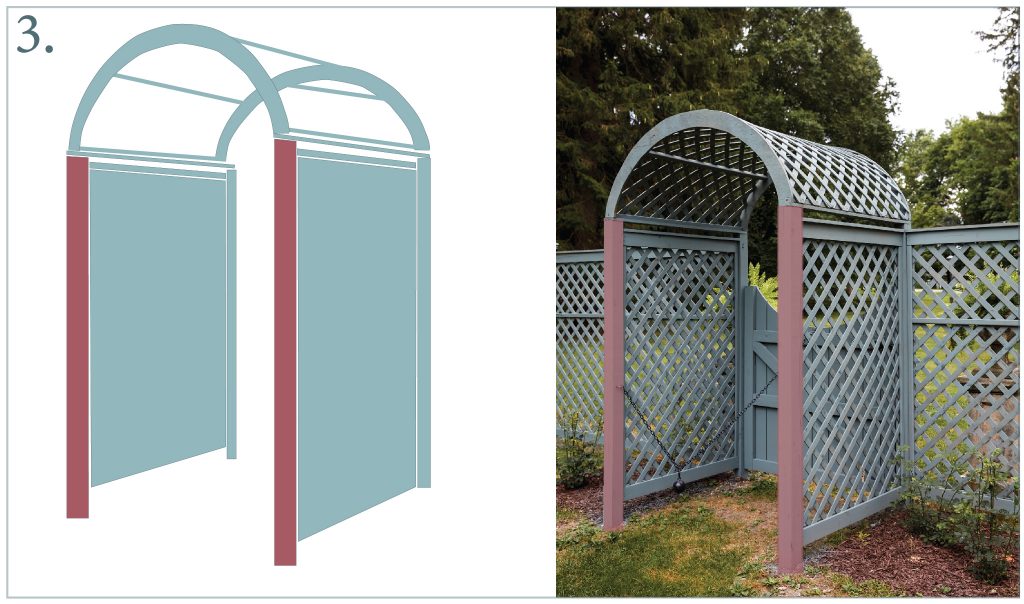
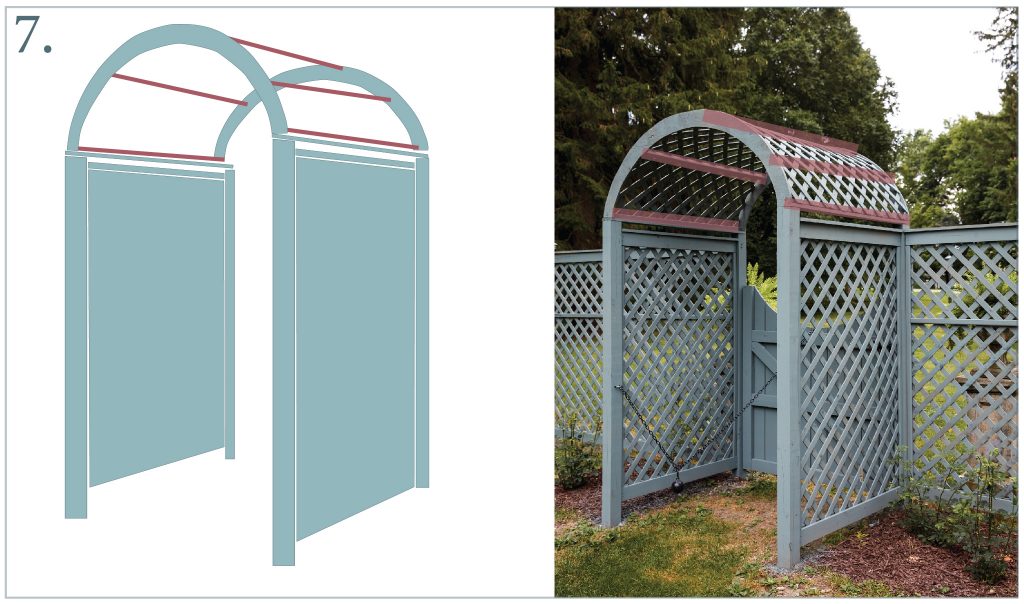
- We set the two 4×4 posts that lined up with the rest of the fence, and would eventually hold the gate. Use lots of concrete if you plan on a heavy gate.
- Then we built the side frames at the desired size (ours are about 4 ft) and matched the height to the rest of the fence.
- Using the side frames to measure, we set the 4×4 posts inside the fence. This made our tunnel.
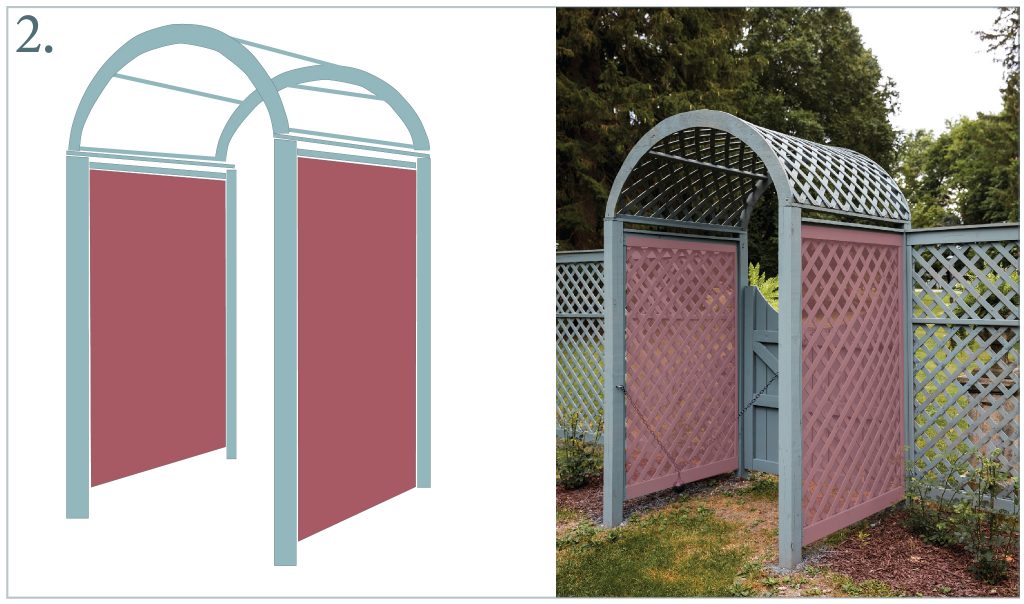
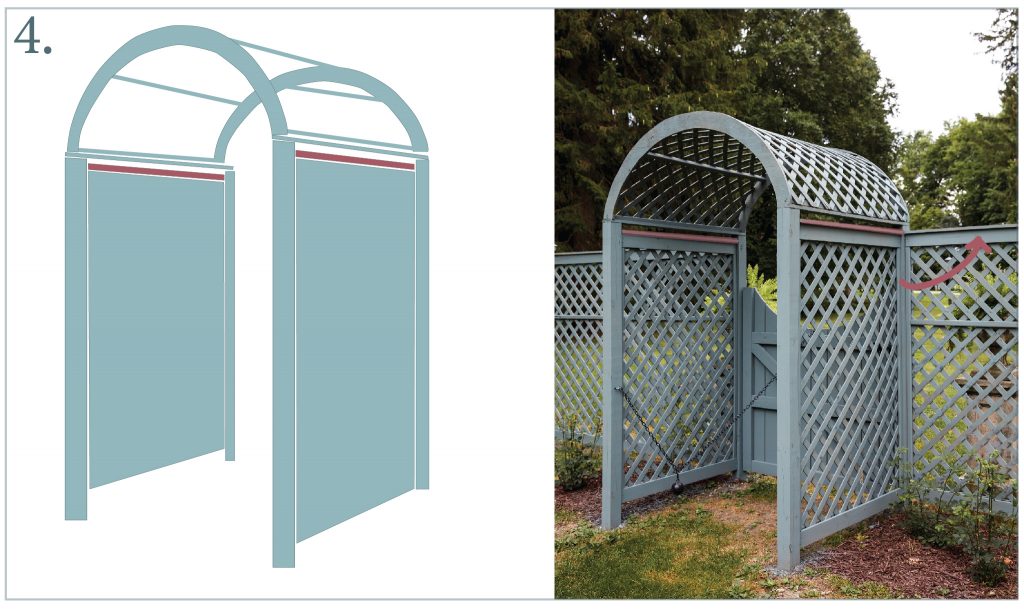
- Add the frame cap to the frames. These should line up with the regular fence to continue the eye line.
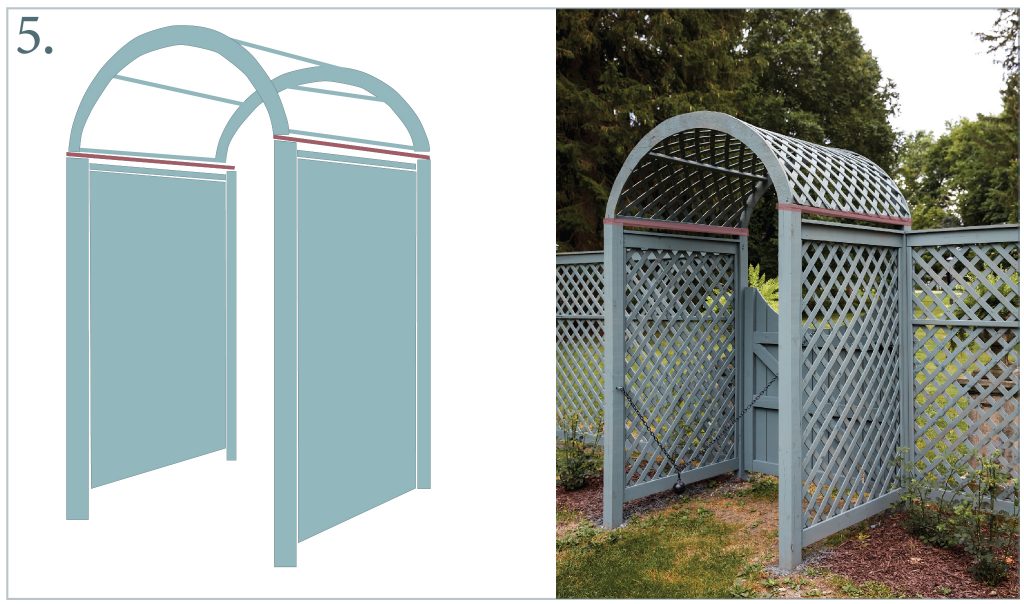
- We added one decorative piece of wood to help visually join the sides and top arch.
- Now we need a top of the arbor. We used an old plastic arbor to get a nice half circle. You can make a template out of cardboard. Use those math skills! I would recommend cutting out your cardboard and holding it up!!! For realz, took us a few tries. Make sure you love it. Using the width between your posts, and the height of your arch, cut out two exterior ply wood arches.
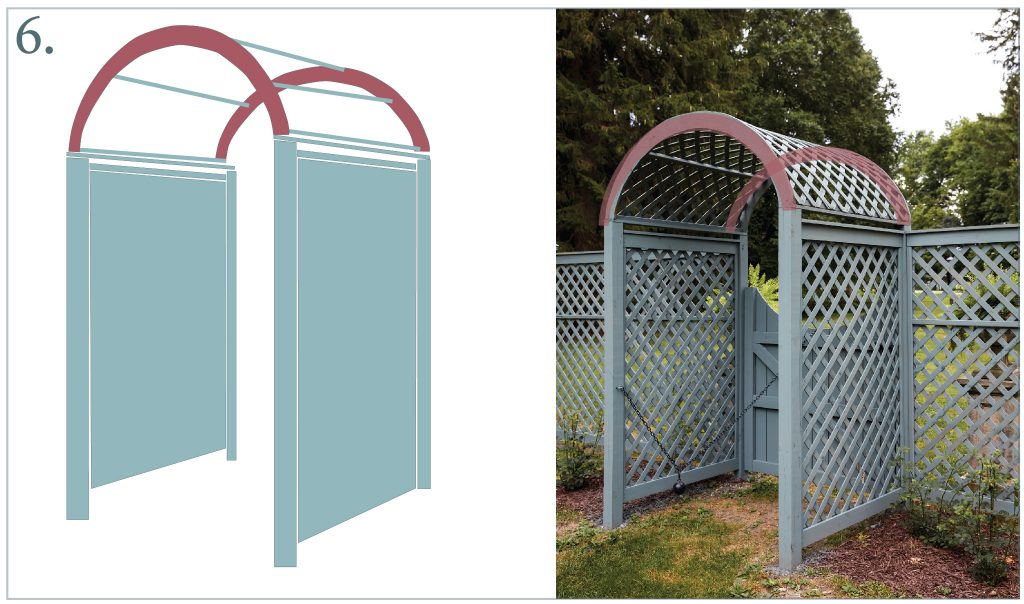
- Add in five cross bar supports to complete the frame.
- Wrap arch with lattice.
- Attach the arch to the bottom.


Beautiful fence! I really dislike the look of classic vinyl fences, but I also hate the upkeep required for wood fences. We compromised by going with this fence https://eprivacylink.com/products/bufftech-stone-wood-fences/sherwood/ that looks a lot like a wood fence but is actually vinyl, so best of both worlds. I know it wouldn’t work for everyone, but it’s worked for us! I do love your real wood fence and especially the arbor! Beautiful work!
I love the arbor and the garden gate. It reminds me “the secret garden”. Beautiful job and beautiful color the fence as well. Pinning now for inspiration.
Well done, looks great. Adding the lattice throughout is a good touch. We do some customization at our company, as well, mostly wood fences. But this color and style looks perfect for this yard.
Great looking addition! The lattice really stands out.
That looks amazing! I love the arbor and the color choice. Nice work!
I can’t even believe you didn’t hire someone to make that arbor. It looks professional! The color choice is spot on! Now I’m curious if I could do this in our yard…