5 Step Workflow: Food Photography from Capture to Final Delivery
This post is sponsored by the Adobe Creative Cloud Photography plan. We started using Adobe Photoshop in high school (1996!) and have learned with Adobe through our college education at Savannah College of Art and Design. For the last decade we’ve been using Adobe in our professional careers. To say the least, we’re excited to collaborate with them and hope you enjoy the 5 Step Workflow we’ve put together.
———
Setting up and completing a photography assignment can be a lot of work, but having a great workflow cuts out a lot of the hassle and questions. We’ll walk you through our process to get the job done. Feel free to adopt any part that works for you.
We use this workflow for every shoot we work on. It doesn’t matter how big or how small. If it’s just the two of us shooting for our blog, or if it’s a large production with 20 people on set, we still use the same process.
As your photography career grows you’ll find that along with being creative, you also need to be organized. This may not be our strong suit as artists, but following a good workflow will get you halfway there.
A big part of our workflow is our client experience. Some of our shoots are for advertising which can be very detail oriented! We want to make sure our clients see what’s happening in real time. We discuss any issues/needs/changes on set, rather than after-the-fact.
Even if you are not in the position of working with clients yet, we feel this aspect of the workflow is such an important part of being a professional photographer. Maybe you’re a food blogger photographing your own cookbook and you might have your editor on set that needs to see images as they are being shot. When you do get that first client assignment, you’ll have all the tools and know-how to work in a professional atmosphere and come off looking like a rockstar!
5 Step Workflow
Step 1: Pack the gear for the shoot
We always say “the best camera, is the one with you” and that works for when you are out and about. When you have time to plan for a shoot, make sure you have the right tools for the job. We have a standard kit we usually bring with us:
The Camera Case:
- Canon 5DSR
- Canon 5DMKII (for backup, ALWAYS take a backup)
- Lens: Canon 28-70mm,100mm Macro, 50mm, Zeiss 35mm
- Mac Laptop with Adobe Photoshop and Lightroom
- cable release, tethering cord and extension
- hard drive
Lighting and Grip:
- Profoto 2400ws Acute 2R with 3 flash heads
- Eizo monitor
- Scrim Jim and silk (for daylight)
- Tripod with overhead arm
- C-stands and light stands
- Toolbox, tape and clamps (a look at our Grip Kit here)
Step 2: The setup
Once we’re on set, this is where our ‘setup’ workflow really starts to kick in. We have a series of steps that we do to get everything up and running. These steps work if you are shooting food to fashion – the process can be applied to various types of shoots.
1. Setup the computer and attach the monitor
2. Setup your client/job folder and startup your capture program (i.e. Adobe Lightroom) with which you are going to shoot tethered.
3. Setup your camera and make sure it is communicating with the computer
This is a really important step in the process. You don’t want to be ready to go with a hot plate of food on set and not have the camera working. I know you have all heard before about shooting tethered, but I can’t stress enough how important this is when photographing food. Tethering is when you connect your camera to your computer via a cord, so every time you capture an image it is displayed and saved onto your computer. Tether Tools is a great place to find the cord you need. By shooting tethered, you have the ability to see every one of those syrup drips from pancakes, or magnificent splashes from drink pours as each capture comes through. And probably even more important, to see if you are actually in focus, you can’t necessarily see that from the screen on the back of the camera. The reason for the extra monitor, is not only to see the images nice and large while shooting, but it is more color-accurate than the laptop screen.
4. Open Adobe Photoshop, incase you have to mock up comps (images roughly put together for layout purposes) on set. We often have complex shoots that need to have a few images put together to mock up a comp, so we can see what the final image may look like. Whether it is just seeing how something looks in layout, or combining a few images for the final result, Adobe Photoshop is key for quickly putting this together.
5. Next we will get our backgrounds setup and the lighting in place for our first shot. We use “stand in” plates/bowls and food to get the camera angle and lights into the right position before the real food comes out. By using a plate around the same size of the plate that the final food will be on, will allow us to get the composition right without sacrificing the real food.
Step 3: Editing as we go
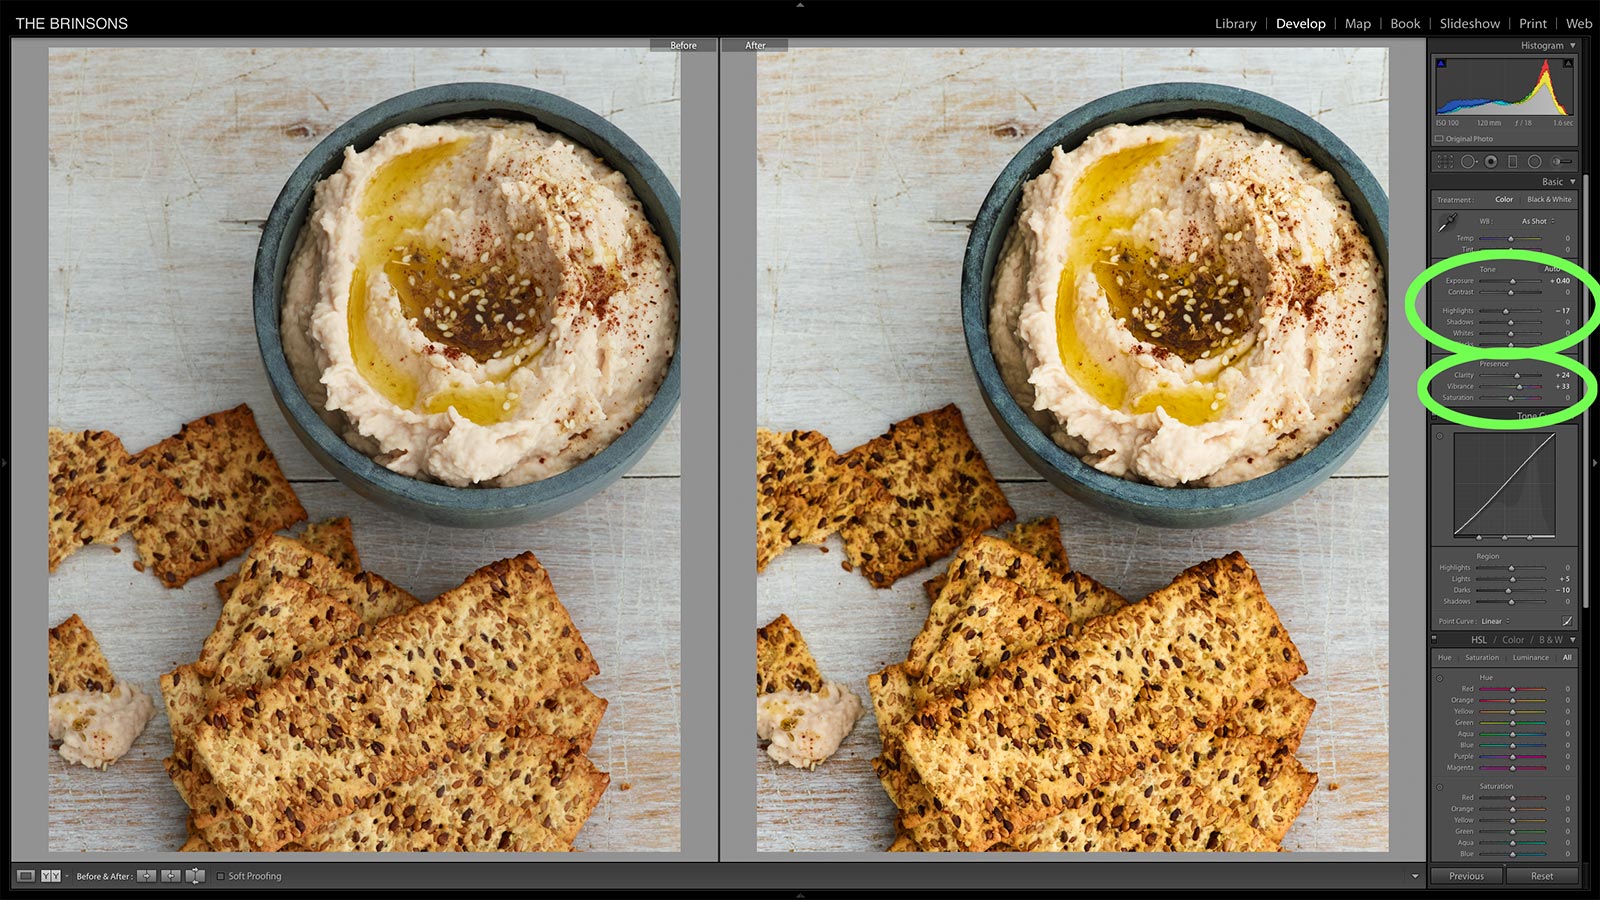
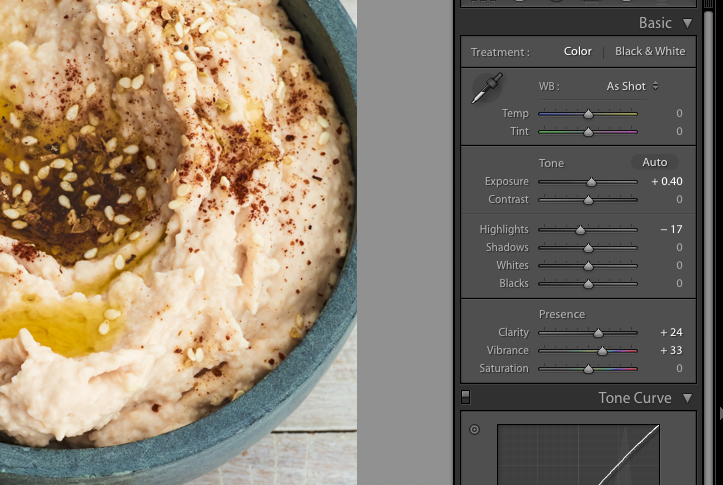
Editing while we go is a key part of our workflow while shooting. Each new capture from the camera will be named correctly so it matches up with our shot list, so there is no confusion. We also will adjust the images as they come into the capture program by adding cropping, curves, clarity and even applying masks to selected areas so we adjust them independently. Best of all, we tag client selects as we go. Everyone at the shoot knows what the deliverables are.
- As we begin each new setup, we change the image name in the capture software to match the name on our shot list. EX; #1 on the shot list is “Pancakes” so we change the image file name to “Pancakes” in the capture software so each shot we take while tethered will have the current shot list name in it. When we move on to #2 on the shot list we will change the file name to that name.
- Cropping is very important to see when we are shooting, because we are generally shooting to layout. It may be a magazine or advertising, but it is important to know what dimensions your crop is so that your image composition stays strong.
- We LOVE curves! We are all about contrast, and we find curves are the best way to achieve this. By applying the curves on set, this lets you and the client see how the image will look with your touches on it.
- Our new favorite tool is “Clarity”, it packs such a punch. This is a new addition to our workflow. A little goes a long way, so use it wisely. Clarity helps add a crispness and contrast to the shot, which is on par with our aesthetic.
- Masking selected areas to be able to adjust objects individually is an extremely useful tool. You may have the whole scene perfectly lit, but one object is giving you a problem. You don’t want to change all the lighting you have created for the shot for that one item, so by masking it crudely and adjusting it right on-the-spot, you can see what it will look like after retouching. As I mentioned, we masked this crudely, so we will have to refine this mask later in the retouching phase. This allows you to share your photographic vision as you are shooting!
- Marking selects (the images the client or you have selected) as we go cuts down on the editing process and allow us know what FPO (for position only) images to send the client for layout. There may be a few version of each shot, so narrowing down those images as we shoot saves tons of time.
- Our last step for editing on-the-go is file delivery. By making the selects as we go, you know what FPO (for position only) images to send to the client. We have a free video here on how to automate FPO’s from Adobe Lightroom.
Step 4: Retouching
Once the final selects from the shoot have been made, we can start retouching. Adobe is standard for retouching images and such a great tool. Here is our basic step-by-step workflow with any image we work on.
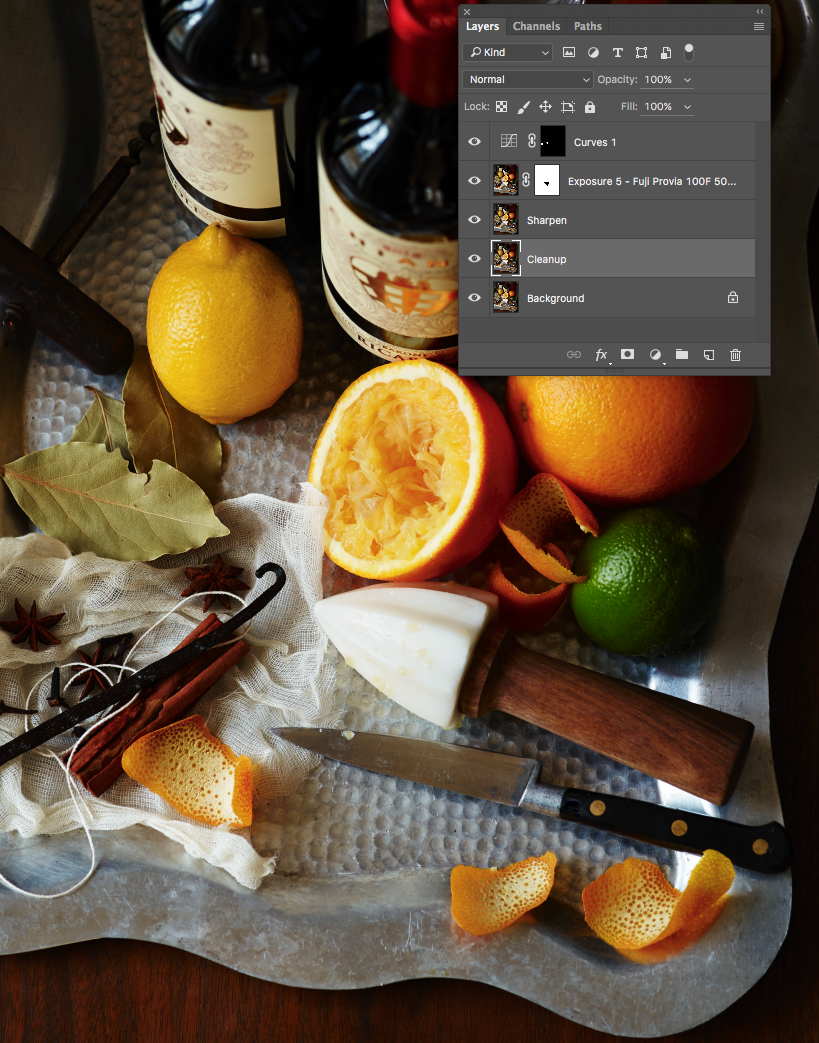
- Open the image in Adobe Photoshop and create a duplicate layer and label it “cleanup”. This is to make sure we don’t do anything destructive to the original image. Always think backup!
- On the “cleanup” layer, remove any dust or other marks you see that you don’t like. We use a few tools here, clone tool, spot healing tool, and the dust and scratches filter with a mask.
- We then duplicate the “cleanup” layer and relabel it to do any more retouching of the photograph.
- If we are applying a film look, we use the third party Alien Skin Exposure X filter and it will create a new layer.
- Make a stamped layer which combines all the layers into one separate layer, leaving all the other layers intact. We will label this layer Sharpen, and apply sharpening 50-75%.
Step 5: Cataloging and Delivery
Now that we have all of our retouched files saved we catalog them and get them ready for delivery. This is where we really think Adobe Lightroom shines. Lightroom is such a powerful catalog tool, we couldn’t live without it. We are able to manage our archive of jobs and access them quickly. We can also quickly touch up images, re-crop images for other uses, sync images with our photography agent through Dropbox and export images in a variety of custom saved formats.
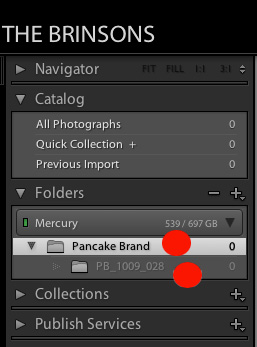
- Create a folder in the Library with the project or job name. Within that folder we create another folder with our job number (you may have multiple shoots over a period of time with different job numbers but for the same project or job, so it helps keep them all organized).
- Import retouched files into the folder with the project/job name. At this point we can see that we have our images cataloged, but we still need to deliver these files for the project/job.
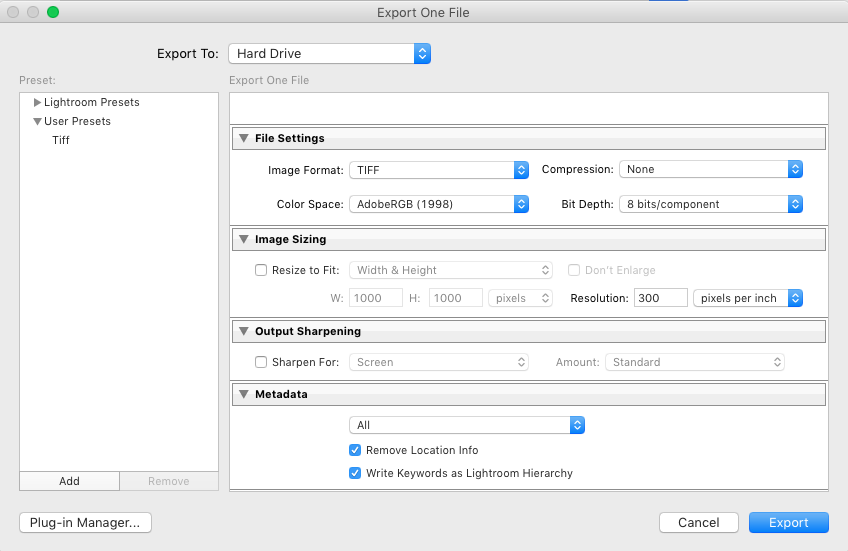
- Next, through the Export function of Lightroom, we export these images as flattened TIFFs (we never share our layered files).
- To finish up our workflow we upload the images to our FTP and send a link to download.
We know this may seem like a lot to do, but as you progress it will all become like second nature. By following this workflow, or adapting it to your own, you will be on the road to success. It’s all about repetition and using the right tools for your job.




Yup, definitely bookmarking this post to refer to forever and ever. thanks for dropping such amazing knowledge!
Just for clarity, you tether directly into Photoshop and use Lightroom primarily as a cataloging tool, not an ingest or editing tool?
You tether into Lightroom to shoot and retouch in Photoshop. Lightroom also acts as an amazing catalog after the images are retouched. Lightroom has many abilities but Photoshop has more intensive retouching tools. Thanks for reading the blog!
Very cool post. I need to learn the tethering into Lightroom bit. Love the idea of getting so much done and approved at the shoot.
It’s really handy! And you can make the adjustments right there too!